Recipe Name: | Female patients who have not had a cervical screening test |
Rationale: | Australia has established a new cervical screening process based on recommendations by Australia’s independent Medical Services Advisory Committee (MSAC). This new test regime has commenced on the 1/12/2017. MSAC also advised that
For full information on the new test please check here: http://www.health.gov.au/internet/screening/publishing.nsf/Content/healthcare-providers |
Target: | Eligible female patients for a cervical screening test |
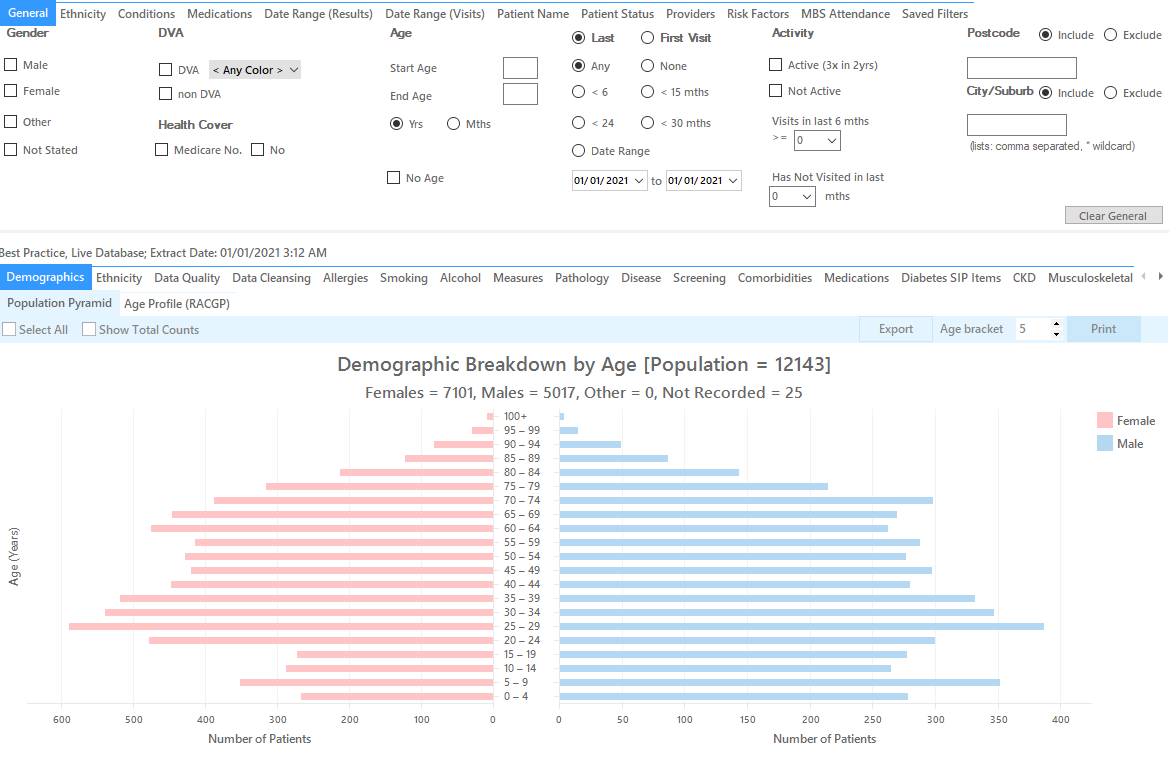
CAT Starting Point: |
|
RECIPE Steps Filters:
As the new test has just been introduced, there is a transition phase for some time. You can use the filters (for age and/or attendance) to specify which group of patients you are interested in.
You don’t have to filter for gender or age as CAT will do this automatically for the cervical screening report
If you have applied a filter:
- Click ‘Recalculate’
- Click ‘Hide Filters’
Recipe Steps Reports
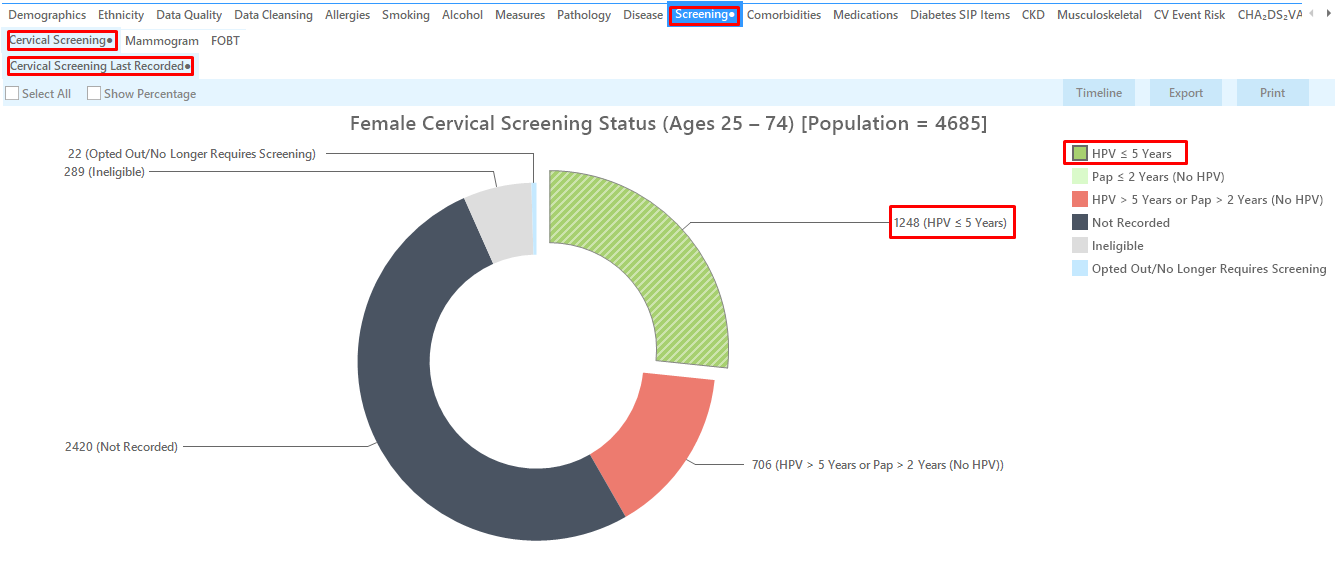
- Select ‘Screening’ tab
- Select ‘Cervical Screening’ tab
- Click on one or more parts of the graph of interest:
- HPV <= 5yrs
- Pap <= 2 yrs (no HPV)
- HPV>5yrs / Pap>2yrs (no HPV)
- Not Recorded
- Ineligible
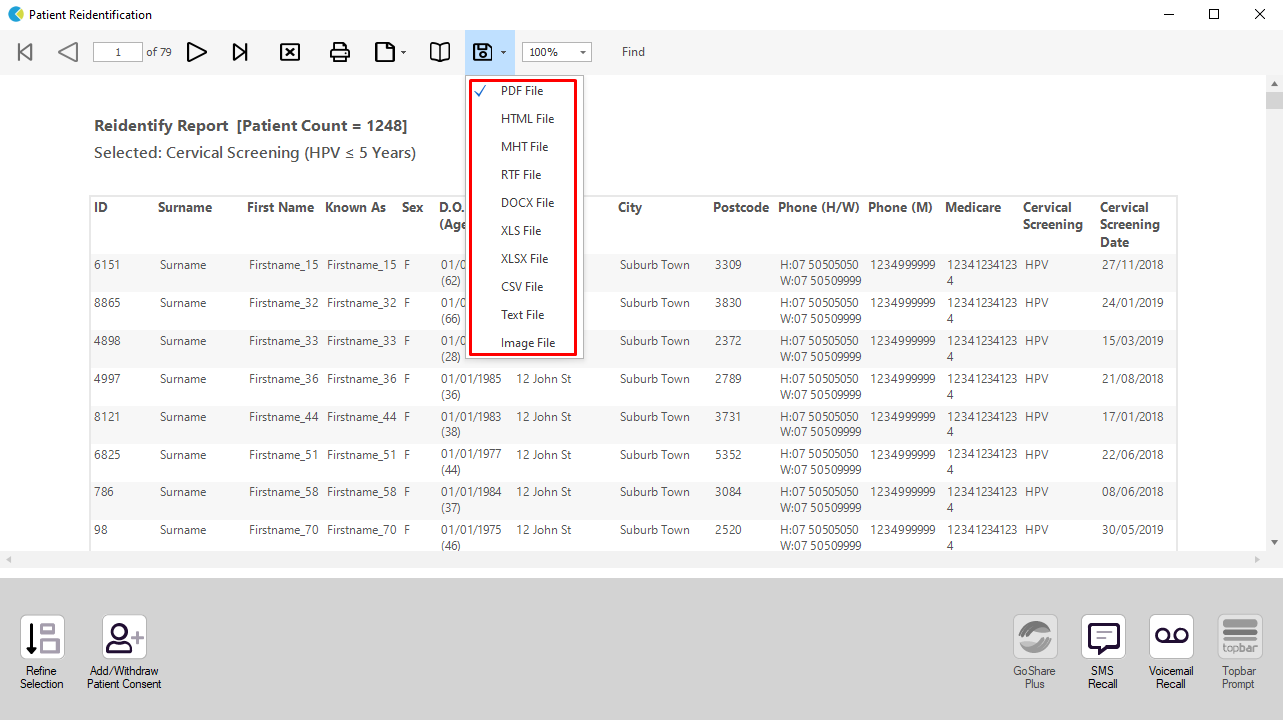
- Click on ‘Export’ or to see the list of patients selected
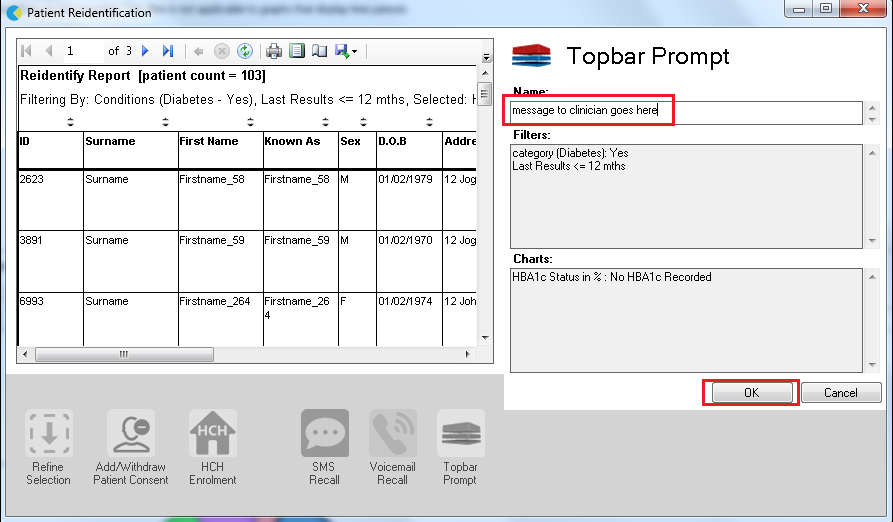
Create a prompt to display in Topbar Remember you need to be in the CAT4 Daily View to be able to create prompts. Other pre-requisites are: To start click on the 'Daily View' icon on the top of your CAT4 screen: Once you have applied the filter(s) and displayed the patients of interest as described above, you can create a prompt that will be shown to all clinicians using Topbar if a patient meeting the prompt criteria is opened in their clinical system. The full guide is available at CAT PLUS PROMPTS and a short guide on how to create prompts in CAT4 can be found at Creating a Prompt in CAT4 To start you have to use the drop-down menu at the bottom of the patient details report and select "Prompt at Consult - Topbar" then click on "Go" to give the new prompt a name. The name you enter is the prompt text displayed in Topbar, so choose a simple but clear name that tells the clinician seeing the prompt what should be done.
To Export Patient List to Microsoft Excel:
1. Click on the “Export Icon” at the top of the Patient Reidentification window.
2. Click on “Excel”
3. Choose a file name and a location to save to (eg. Create a folder C:/ClinicalAudit/CAT Patient FollowUp)
4. Click “Save”
The steps above will produce a list of patients with contact details in MS Excel which can then be used to:
1. Go back through the individual patient records in the GP Clinical Desktop System (CDS) and update known records
2. Phone patients to update their record
3. Produce a mail merge to recall patients for follow up


